API Quick Start
AfterShip helps eCommerce businesses to update and manage their shipment with efficiency.
You can seamlessly manage tracking with AfterShip's Tracking API and use AfterShip's post-purchase services from the admin portal. Or you can store the tracking data through API and webhook, and customize the post-purchase services yourself.
This quickstart guide intends to walk you through 3 common scenarios to let you understand how to use AfterShip to create & manage your tracking.
1. What's tracking?
Tracking refers to shipment-related information, including a carrier's name, tracking number provided by the carrier, and checkpoints.
For all fields consisting 'tracking,' please refer to Tracking Object
2. Get the API key
AfterShip verifies a user's request by adding an aftership-api-key in the header. So you shall get the aftership-api-key first.
Enter settings, you can find a default API key.
You can generate different API keys for other projects.

3. API Endpoint
All endpoints are only accessible via HTTPS and are located at api.aftership.com.
4. Common scenarios
Scenario 1. Create tracking
Use POST API https://api.aftership.com/v4/trackings
preparing...
When creating a tracking event, we suggest you provide both the tracking number and other courier information for us.
But if you don't have such info, you can skip it, and we will try to detect the courier for you.
Here are 3 ways to provide the courier's info
1 . If you know the slug of a specific courier, please fill the slug field (e.g., dhl-germany).
You could refer to AfterShip's Courier List. Send the Courier Slug (courier's name) accurately according to the List (Column A of the list).
2 . If you know the courier group but are unsure about the slug, please fill the slug_group field.
You could refer to AfterShip's Slug-Groups List , AfterShip will detect tracking that belongs to the slug group.
3 . If you don't know the courier, you can skip this field. We will detect the courier for you.
When auto-detecting the courier, we will refer to your Preferred Courier List that you set on our admin portal.
So we suggest you activate your commonly-used couriers on settings. This will help us map the right courier.
For some couriers, it's mandatory to fill some additional fields for tracking; else your tracking will fail to create.
Please call our Get all couriers API to get the mandatory fields.
Scenario 2 . Update existing tracking
Use API https://developers.aftership.com/reference/trackings#put-trackings-slug-tracking_number
If you want to correct an inaccurate tracking courier, update order information, or add extra information for an existing tracking, you can use the 'Update API'.
Scenario 3. Getting updates on the tracking
1 . Via webhook
AfterShip can push notifications to you for every tracking update via Webhook. With it, you can store all the tracking details and build up your own tracking page.
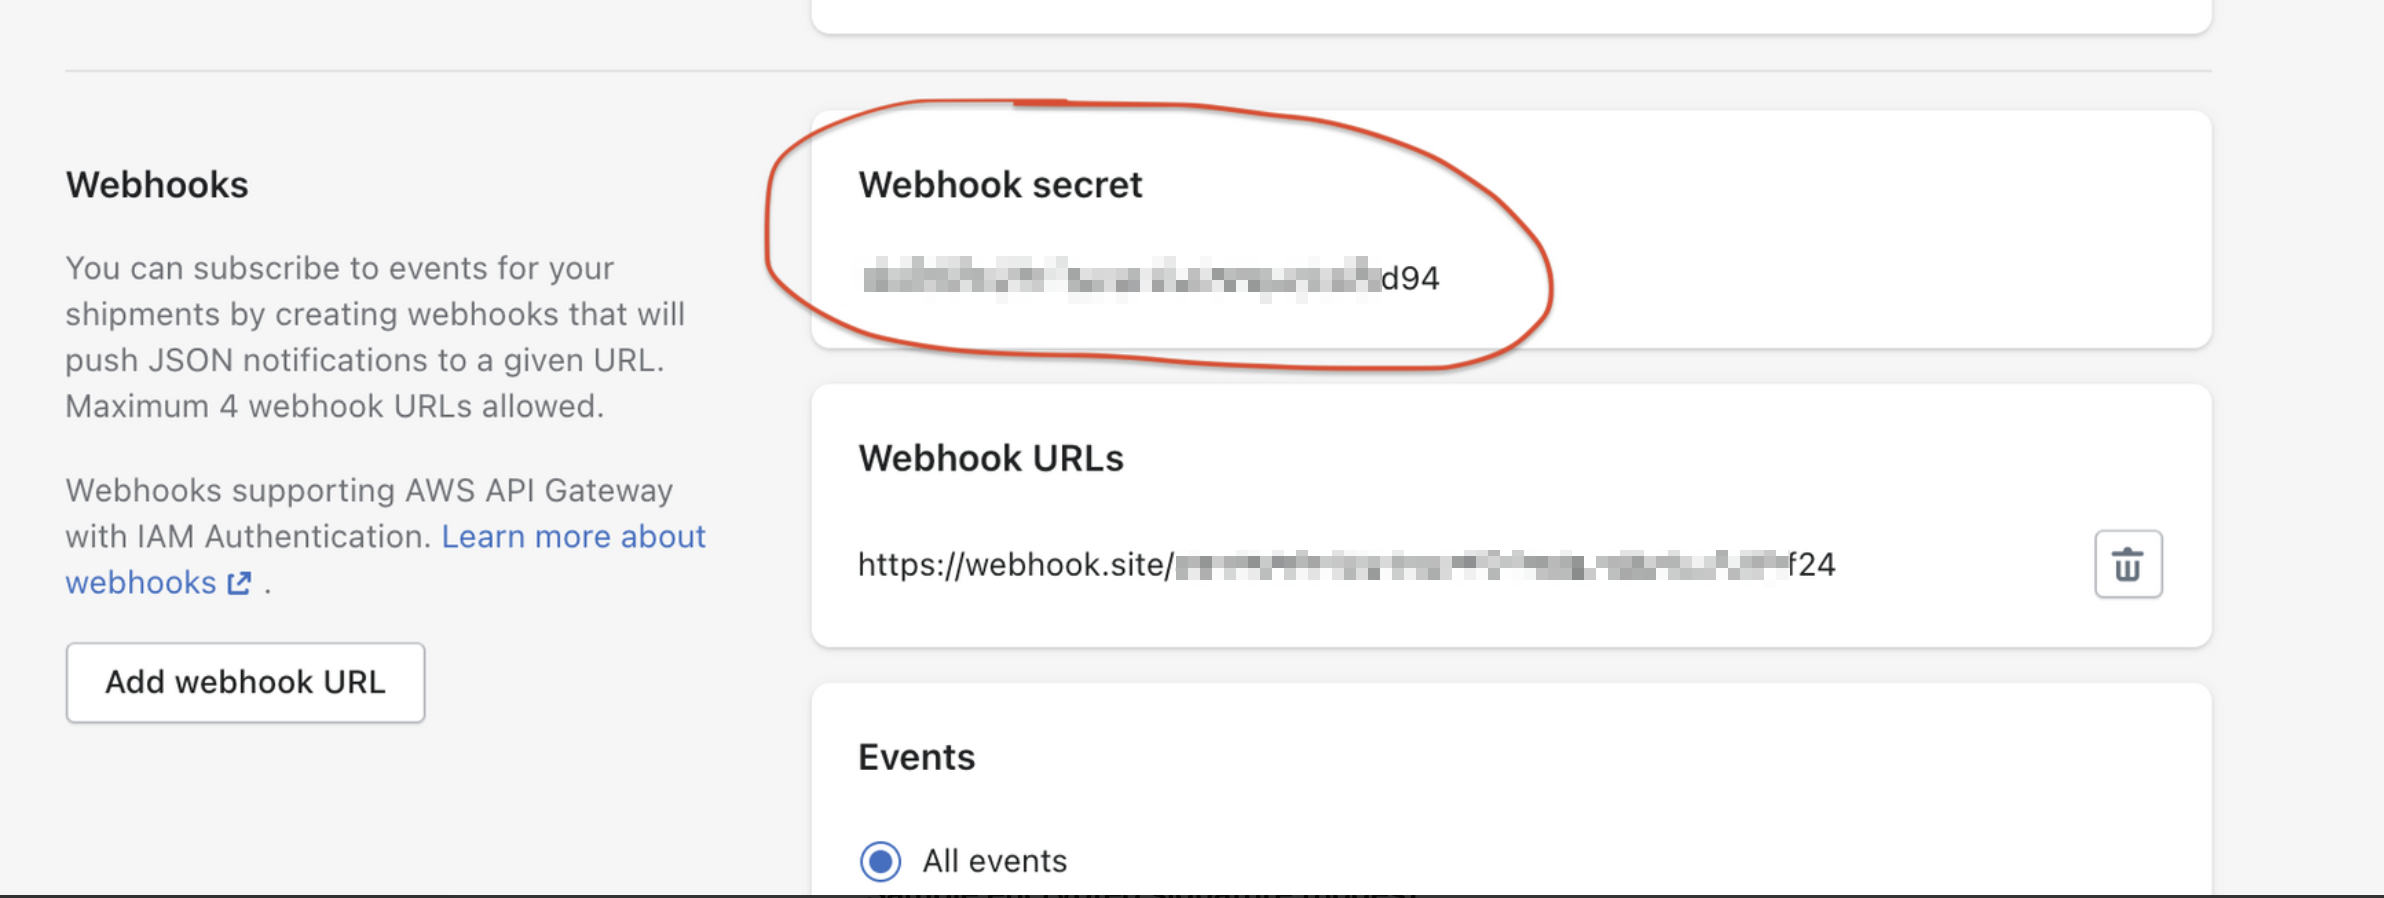
To set up your webhook, enter settings to fill in your webhook URL and save it.
You can add multiple webhook URLs, and we will push notifications to all those URLs.
Webhook secret
For security concerns, Webhook includes a signature for verification.
Each webhook request includes an aftership-hmac-sha256 header. The signature is a base64-encoded HMAC generated using the sha256 algorithm with webhook request body and the webhook secret of your account.
Sample encrypted signature (nodes)
preparing...
Sample webhook body
preparing...
2 . Via API
To retrieve the latest checkpoint, use GET API https://api.aftership.com/v4/last_checkpoint/:slug/:tracking_number
NOTE: GET API limits 10 requests per second and it will show errors if exceeded. Hence, it's not suggested to use the GET API to build your own tracking page.
Sample Request
preparing...
Sample Response
preparing...